

10 Practical Home Repairs You Can Learn to Save Money
Small home problems can become surprisingly expensive.
A loose cabinet handle, small drywall hole, dripping faucet, or damaged window screen may seem too minor to worry about. Yet paying a professional for every little problem can add up over the year.
Learning practical home repairs can also give you more control over routine home maintenance without depending on a professional for every minor problem. Few practical home repairs can help you handle simple household issues yourself, avoid unnecessary service calls, and keep more money in your budget.
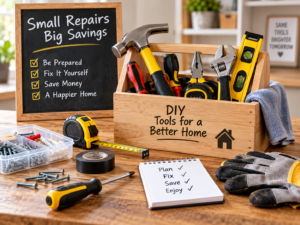
The goal is not to become a professional contractor. It is to learn which minor repairs are reasonable for a homeowner, use the right tools, follow basic safety steps, and know when a job needs professional help.
In the U.S., handyman work commonly involves hourly rates and minimum service charges, so even a short visit can cost more than the materials needed for a simple repair.
Why Learning Practical Home Repairs Can Save Money
The biggest DIY saving is often the labor cost you avoid.
For example, tightening hardware may cost you nothing if you already own a screwdriver. Patching a small wall hole may require only a small amount of spackle and paint. Replacing weatherstripping may cost much less than paying someone to make a simple maintenance visit.
However, DIY does not mean every repair should be done yourself.
A good rule is:
Do simple, low-risk repairs yourself and hire a qualified professional when the work involves serious safety risks, specialized equipment, or systems you do not understand.
Your actual savings will depend on local labor rates, materials, tools, and the condition of the problem. The most useful practical home repairs are usually the ones that require inexpensive materials, basic tools, and a few minutes of your time.
To manage repair costs alongside your other expenses, read our guide on [how to create a monthly budget].
1. Fix a Loose Cabinet Handle or Knob
A loose cabinet handle is one of the easiest household problems to fix.
You normally need only a screwdriver and a few minutes.
How to fix it
- Open the cabinet and locate the mounting screws.
- Hold the handle firmly.
- Tighten the screws carefully.
- Check whether the handle is still loose.
- Replace damaged screws if necessary.
Safety tip
Use the correct screwdriver size so you do not strip the screw head. Do not overtighten the screw because excessive pressure can damage the cabinet surface.
Potential savings
DIY cost: Often $0 if you already have the tool.
Potential service cost avoided: Around $50–$100+ depending on the local minimum service charge.
This is a perfect example of a tiny problem that can create an unnecessary expense if you call someone for it.
2. Patch Small Holes in Drywall
Small holes from picture hooks, wall anchors, or minor bumps can often be repaired without professional help.

You may need lightweight spackle, a putty knife, fine sandpaper, and matching paint.
Step-by-step
- Remove loose material around the hole.
- Apply a small amount of spackle.
- Smooth the surface with a putty knife.
- Let it dry completely.
- Lightly sand the repaired area.
- Apply matching paint.
Safety tip
Wear eye protection when sanding and avoid creating excessive dust. If the wall shows moisture, staining, soft spots, or repeated damage, investigate the source before repairing the surface.
Potential savings
DIY materials: Often around $10–$25.
Potential professional cost avoided: A small drywall repair can potentially cost around $100–$350, depending on the size and local labor rates.
3. Stop a Dripping Faucet
A dripping faucet may be caused by a worn washer, cartridge, O-ring, or another internal component.
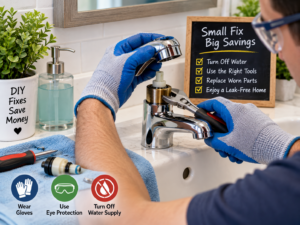
A simple replacement can sometimes be handled by a homeowner with basic tools.
How to approach it
- Identify the faucet type and model if possible.
- Locate the water shutoff valve.
- Turn the water supply off before taking anything apart.
- Open the faucet briefly to release pressure.
- Remove the handle carefully.
- Inspect the internal component.
- Replace the damaged part.
- Reassemble the faucet and check for leaks.
Safety tip
Never start a faucet repair without knowing how to shut off the water. If the shutoff valve is stuck, you cannot identify the plumbing connections, or water continues flowing unexpectedly, stop and call a qualified plumber.
Potential savings
A small plumbing service call can cost $50–$200 or more, depending on the location and repair.
If the replacement part costs $15 and you avoid a $100 service visit, your potential saving is about $85.
4. Replace Worn Weatherstripping Around a Door
A draft around an exterior door can allow conditioned air to escape.
Replacing damaged weatherstripping is a relatively simple maintenance task that can improve the seal around the door.
Step-by-step
- Inspect the existing weatherstripping.
- Measure the door frame.
- Purchase the correct replacement.
- Remove the damaged material.
- Clean the surface.
- Install the new weatherstripping.
- Close the door and check the seal.
The U.S. Department of Energy recommends weatherstripping and caulking as basic air-sealing measures for reducing drafts and air leakage.
Safety tip
Use a stable surface when working around the upper part of a door frame. Do not stand on an unstable chair or stack boxes to reach a high area.
For more guidance, read the U.S. Department of Energy’s guide to insulation and air sealing.
Potential savings
You may spend only a modest amount on replacement material while potentially avoiding a $50–$150+ maintenance visit.
The additional benefit is that reducing drafts may help limit unnecessary heating and cooling losses.
5. Repair a Squeaky or Loose Door
A squeaky door does not always indicate a serious problem.
The cause may simply be dry hinges, loose screws, or minor alignment issues.
Try these steps
- Tighten the hinge screws.
- Apply an appropriate lubricant if needed.
- Open and close the door several times.
- Check whether the door rubs against the frame.
- Replace damaged hardware if necessary.
Safety tip
Keep your fingers away from hinge gaps while moving the door. If the door is unusually heavy or the frame appears damaged, ask another person for help rather than trying to force the repair.
Potential savings
DIY cost: Often $0–$10.
Potential service cost avoided: Approximately $50–$150+, depending on the job.
6. Replace a Damaged Window Screen
A torn window screen is usually a cosmetic and functional problem rather than a major repair.
Replacement mesh and basic tools can often handle a standard screen.
Step-by-step
- Remove the screen carefully.
- Remove the old spline.
- Take out the damaged mesh.
- Lay the replacement mesh over the frame.
- Press the spline into the groove.
- Trim the excess material.
- Reinstall the screen.
Safety tip
Wear gloves when handling damaged metal or fiberglass screen material. If the screen is on an upper floor and removing it requires leaning outside, do not attempt the repair yourself.
Potential savings
DIY materials: Often around $10–$30.
Potential service cost avoided: Roughly $50–$150, depending on local labor and whether the screen frame also needs replacement.
7. Re-Caulk Small Gaps Around a Tub or Sink
Old, cracked, or separated caulk around a bathroom fixture can allow water to reach areas where it should not.
Replacing deteriorated caulk is a useful maintenance skill.
How to do it
- Remove the old damaged caulk.
- Clean the surface thoroughly.
- Allow the area to dry completely.
- Apply bathroom-rated caulk.
- Smooth the bead carefully.
- Follow the product’s curing instructions before exposing it to water.
Safety tip
Keep the bathroom area dry while working and provide ventilation according to the product instructions. Do not simply cover visible mold, soft flooring, or water damage with new caulk.
If you see persistent moisture or structural damage, find the source before making a cosmetic repair.
Potential savings
DIY materials: Often around $10–$25.
Potential professional labor avoided: Potentially $75–$200+, depending on the job and local service minimum.
8. Replace a Basic Showerhead
Replacing a standard showerhead can be a straightforward household project when the connection is accessible and in good condition.
Simple process
- Unscrew the existing showerhead.
- Clean the exposed threads.
- Follow the new product’s installation instructions.
- Tighten the replacement carefully.
- Turn the water on slowly.
- Check for leaks.
Safety tip
Do not force a corroded fitting. If the pipe begins moving inside the wall, stop immediately because continuing could create a much larger plumbing problem.
Use only the sealing material recommended by the product instructions.
Potential savings
You mainly pay for the new showerhead and any small installation supplies.
You may avoid approximately $50–$150+ in labor or service charges.
9. Fix a Loose Toilet Seat
A loose toilet seat is another minor issue that can often be corrected in minutes.
Step-by-step
- Locate the mounting bolts.
- Remove the caps if necessary.
- Hold the nut underneath.
- Tighten the mounting hardware carefully.
- Check that the seat is secure.
Safety tip
Do not overtighten the mounting bolts because excessive pressure can crack porcelain.
Also check whether water is leaking around the base of the toilet. A leaking toilet is a different problem and should not be treated as a simple seat repair.
Potential savings
DIY cost: Often $0–$20.
Potential service cost avoided: Approximately $50–$150+ depending on the local service minimum.
10. Replace a Furnace or HVAC Filter
Replacing an HVAC filter is basic maintenance rather than a repair, but it is an important skill for homeowners.
A clogged filter can restrict airflow and make the system work harder.
Step-by-step
- Check the filter size.
- Purchase the correct replacement.
- Follow the equipment instructions for safely accessing the filter.
- Remove the old filter.
- Check the airflow arrow on the replacement.
- Install the new filter.
- Record the replacement date.
The U.S. Department of Energy recommends regular filter maintenance as part of basic HVAC care.

Safety tip
Do not open electrical panels or attempt to repair internal HVAC components just because you are replacing the filter. If the system has electrical, refrigerant, combustion, or mechanical problems, use a qualified HVAC professional.
Potential savings
You may avoid a maintenance visit for a simple filter replacement, while regular filter changes can also help maintain proper airflow.
The exact replacement schedule depends on the equipment, filter type, household conditions, and manufacturer recommendations.
For additional maintenance guidance, see the U.S. Department of Energy’s HVAC filter maintenance information.
How Much Can These Practical Home Repairs Save?
The smartest way to calculate DIY savings is to compare the professional service cost with your total DIY cost.
For example:
- Professional visit: $100
- DIY supplies: $15
- Potential saving: $85
Another example:
- Professional visit: $150
- DIY materials: $25
- Potential saving: $125
And:
- Professional visit: $200
- DIY materials: $30
- Potential saving: $170
These are examples rather than guaranteed prices.
U.S. handyman pricing can vary substantially by location, job complexity, and provider, with service minimums sometimes applying even when the work itself takes only a short time.
The more useful habit is to ask:
“Can I safely learn this repair, and will the DIY cost be meaningfully lower than the professional charge?”
When You Should Not DIY a Home Repair
Saving money should never come before safety.
Do not attempt a repair yourself when it involves:
- Gas lines or gas appliances
- Major electrical wiring
- Electrical panels
- Structural damage
- Major plumbing changes
- Roof work involving fall risks
- Refrigerant systems
- Significant water damage
- Suspected asbestos or other hazardous materials
- Problems you cannot confidently identify
Some work may also require permits or licensed professionals depending on your state and local rules.
If you are unsure, getting a professional assessment can be cheaper than repairing a mistake later.
A Simple Money-Saving Repair Routine
Use this process whenever you notice a minor household problem:
- Identify the problem.
- Find out what is causing it.
- Check whether the repair is low-risk.
- Read the manufacturer’s instructions.
- Gather the correct tools and replacement parts.
- Compare DIY costs with professional charges.
- Protect yourself with appropriate safety equipment.
- Start only if you understand the repair.
- Stop immediately if the problem becomes more complicated.
- Record what you learned for future maintenance.
This approach helps you save money without turning every household problem into a risky DIY project.
Final Thoughts
You do not need to become an expert contractor to reduce everyday home expenses.
Learning practical home repairs can help you handle loose hardware, small drywall damage, drafts, screens, caulk, basic fixtures, and other minor problems without automatically paying for a service visit.
Start with simple, low-risk projects and build your skills gradually.
The smartest DIY homeowner also knows when not to DIY. If a repair involves electricity, gas, structural safety, major plumbing, hazardous materials, or equipment you do not understand, paying a qualified professional can protect both your home and your wallet.
For more everyday money-saving ideas, read our guides on smart ways to save money every day and how to create a monthly budget.
Frequently Asked Questions
1. How much money can DIY home repairs save?
Small DIY fixes can potentially save $50–$200 or more when they eliminate a service-call or handyman charge.
2. What home repairs are easiest for beginners?
Loose hardware, small drywall patches, door adjustments, window screens, weatherstripping, and basic fixture replacements are good starting points.
3. Should I repair a dripping faucet myself?
You can handle a simple faucet repair if you can safely shut off the water and understand the replacement process.
4. Can DIY repairs really reduce home expenses?
Yes. Avoiding service-call fees and handling simple maintenance yourself can reduce repair costs over time.
5. How do I know when not to DIY?
Avoid DIY work involving gas, major electrical systems, structural damage, serious leaks, hazardous materials, or tasks you cannot safely identify.
6. Is DIY always cheaper than hiring a professional?
No. DIY may cost more if you need expensive tools, make a mistake, or discover a larger problem during the repair.
7. What safety equipment should I use for DIY repairs?
Depending on the task, use appropriate eye protection, gloves, dust protection, stable footwear, and proper tools while following the product instructions.
8. Can small home maintenance tasks save energy?
Yes. Weatherstripping, caulking, and proper HVAC filter maintenance can help reduce drafts, improve airflow, and limit avoidable energy waste.